A windsurfing, CSS-grudging, IE-hating, web-developing, gigantic-machine-puzzling blog

Category: tips Page 1 of 2

DJI Mavic Air vs Mavic Pro vs Spark Specs Comparison

It’s been a whole entire day since the Mavic Air was unveiled & the internet hasn’t put together a specs comparison of DJI’s newest drone with their other lower-end models. To make things worse, the DJI website doesn’t use consistent units.

TL;DR: If you want 4K video & don’t mind the shorter range & somewhat shorter flight time, get the Mavic Air. Otherwise get the Mavic Pro. Get the Spark if you don’t have loads of money.

So I’ve compiled & converted all that for you. Here goes:

 DRONE STATS Spark Mavic Air Mavic Pro
Flight time 16 mins 21 mins 27 mins
Range 1.2 mi (2 km) 2.5 mi (4 km) 4.3 mi (7 km)
Top Speed  31 mph (50 kph) 42 mph (68 kph) 40 mph (65 kph)
Ascent 9.8 ft/s (3 m/s) 9.8 ft/s (3 m/s) 16.4 ft/s (5 m/s)
Descent 9.8 ft/s (3 m/s) 6.6 ft/s (2 m/s) 9.8 ft/s (3 m/s)

Notes: “Range” is the transmitter range, not total theoretical travel distance. Top speeds are in sport mode. Some stats were rounded to whole numbers because as you learn in school, sometimes decimals are ridiculous.

 CAMERA STATS Spark Mavic Air Mavic Pro
Max resolution HD (1080p) 4K (2160p) 4K (2160p)
Max HD framerate 30 fps 120 fps 96 fps
Max 4K framerate N/A 30 fps 30 fps


Plesk Apache 404 error: File does not exist: /var/www/vhosts/default/htdocs/

You’ve no doubt discovered massive amounts of 404 errors in your main Apache error log that go something like:

File does not exist: /var/www/vhosts/default/htdocs/....

The requests may appear to be legitimate requests for page on the the primary virtualhost, but are returning 404 errors. Or, they may be crap requests to /var/www/vhosts/default/htdocs/phpMyAdmin etc made by script kiddies looking for vulnerabilities. Sound familiar?

Chances are you have SSL disabled for the domain in Plesk, & these requests to vhosts/default/htdocs/ are from HTTPS requests.

Plesk handles this use case in the most asinine way possible.

Since you have SSL disabled for your virtualhost, Plesk doesn’t route HTTPS requests to any virtualhost. Instead, it’s using the default host settings in /etc/httpd/conf/plesk.conf.d which can be something like:

<VirtualHost your_ip_here:7081 127.0.0.1:7081>
    ServerName "default-your_underscored_ip_here"
    DocumentRoot "/var/www/vhosts/default/htdocs"
    ....
</VirtualHost>

Little-known (to me) Plesk fact: For SSL requests, Apache listens to port 7081 when it’s running behind nginx, per /etc/httpd/conf.d/ssl.conf

How do you know this is going on? Enable servername & port logging in access_log so you can tell exactly what these requests are coming in as. To set that up, in /etc/httpd/conf/httpd.conf look for where your main access_log is defined, like:

 CustomLog logs/access_log combined

Then look for a LogFormat line that defines the log format nickname “combined”:

LogFormat "%h %l %u %t \"%r\" %>s %b \"%{Referer}i\" \"%{User-Agent}i\"" combined

Add %v %V %p in there — right after %t is a good spot. Doing this adds the servername in two flavors, & the port of the original request. The servername helps you to determine which section of your Apache config is getting used, if you aren’t sure. The port shows the original — not mapped — port of the request. HTTPS starts out as a port 443 request so you’ll see that in the access log, not port 7081.

Restart Apache, either through Plesk, or apachectl restart. Then go tail -f access_log  to watch the log with that additional data.

How do you fix how Plesk handles these SSL requests? In Plesk…

  • In Hosting Settings for your domain, check the box to enable (…yep) SSL.
  • In the Apache & nginx settings for your domain, under “Additional directives for HTTPS “, add this RewriteRule to redirect HTTPS requests to HTTP:
RewriteEngine On
RewriteRule .* http://%{HTTP_HOST}%{REQUEST_URI} [R=301,L]

That’s the best way I know how to fix this, anyway.

Any other suggestions? Normally you could set up a “black hole” entry, but I’m not sure how to overwrite the default Apache server settings, since server.conf is auto-generated by Plesk.

I’m off to bang some rocks together.

Migrating MediaTemple’s GridServer (GS) to Dedicated Virtual (DV) VPS

I recently moved lots of websites off MediaTemple’s GridServer (gs) platform to their Dedicated Virtual (dv) platform. I’ve kind of abused Grid Server for the past 12 years, but finally the overage fees caught up.

I went with the Plesk 12.5/CentOS6 hosting option one year later, I upgraded DV accounts & did this all over again for Plesk Onyx 17/CentOS7. The standalone DV server was tempting but I don’t quite know enough about Linux admin to go that route.

Here were some of the bigger migration issues going from MediaTemple’s GridServer (gs) to Dedicated Virtual/VPS (dv) service.

Plesk doesn’t come with root enabled.

Chances are you’ll need to enable root, which is done through AccountCenter. At first I tried not to enable root but there’s just too many fixes/workarounds that you can’t do without root access.

Plesk creates websites with the web directory set to httpdocs/

…Whereas GridServer uses html/ for the top-level web directory. I prefer the shorter “html”, & I really don’t like changing things like this in Git which we use for development. Luckily it’s easy to change how Plesk works here.

THE FIX: In Plesk, click on your domain & click Hosting Settings. Change Document Root to html/. Plesk will create html/ but leaves httpdocs/ so you’ll have to delete httpdocs/ manually.

Note: for the rest of this post I’ll continue to reference “httpdocs/” for consistency.

Plesk puts cgi-bin/ as a subdirectory of httpdocs/

In other words, Plesk uses httpdocs/cgi-bin/. GridServer had cgi-bin/ at the same level as html/. So basically if you’ve used Git for years like we have, you can either move the folder in Git & hope the history stays or change how Plesk works. Moving the folder & keeping the Git history is possible, but messing with Git gives me the creeps.

THE FIX: Create cgi-bin/ where you want it & set permissions using chmod 755 cgi-bin/. It’s probably good to follow Plesk convention where top-level web directories are assigned to the psacserv group so chgrp psaserv cgi-bin/ too. This worked with Plesk 12 under CentOS6, but Plesk Onyx under CentOS7 requires cgi-bin/ to stay assigned to the psacln group or else Perl scripts running under Apache mod_cgi will return the 500 error “End of script output before headers” (thank you MediaTemple CloudTech Supervisor Gary R for figuring that out).

Then in Plesk under the domain, click Apache & nginx Settings. Scroll to the “Additional Apache Directives” section and add:

ScriptAlias "/cgi-bin/" "/var/www/vhosts/domain.com/cgi-bin/"

I found out Plesk directly supports moving cgi-bin to the www-root level & doesn’t need a ScriptAlias added manually. Run these commands:

/usr/local/psa/bin/domain -u domain.com -cgi-mode www-root
/usr/local/psa/admin/bin/httpdmng --reconfigure-domain domain.com

In Plesk under Hosting Settings, now you’ll see a select box:

Finally click Hosting Settings & disable “Perl”. It’s not what you think. This Plesk option actually disables mod_perl, & does not disable “regular” mod_cgi Perl.

Mod_perl is very efficient but typically requires porting over your Perl scripts, or else it can wreak havoc, as described in pretty much the entire porting guide.

Fun fact: The Plesk “Perl” option isn’t tied to the cgi-bin/ location. It only updates <Directory> options for the httpdocs/ folder — you can watch Plesk change the setting in vhosts/system/domain.com/conf/httpd_ip_default.conf — so if you’ve moved cgi-bin/ out of httpdocs/ to the www-root level, it won’t actually matter whether or not you disable the “Perl” option in Plesk.

Last step is to delete the now-defunct httpdocs/cgi-bin/ directory.

Plesk creates websites directories with a bunch of default & testing files.

THE FIX: SSH to your account, change to the website directory & rm -rf html/*. I’m assuming you know enough about Linux to realize this deletes everything in html/ so make sure you haven’t uploaded the website files you want to keep, yet.

Plesk sets up subdomains as subdirectories of the parent website.

In other words, Plesk creates domain.com/httpdocs/subdomain.com/. This sucks. Luckily, easy fix. When adding the subdomain site in Plesk, pick the primary domain option rather than the subdomain option. Ignore the “www” prefix. The subdomain site will work fine & you’ll just have an extra domain alias for www.subdomain.domain.com in nginx & Apache that won’t be used.

Plesk forces you to create a different user for each web site.

The files all get assigned to that user, & group psacln. The httpdocs/ directory is also assigned to the same user, & group psaserv. So, users can’t browse each others’ web folders. By default, with Plesk you can’t have an FTP account that has access to multiple web sites, which is what I needed since we use one Git repository deployed via BeanStalk to manage ~30 very similar websites with shared resources.

THE FIX: First su root & grant the psacserv group to ssh/ftp users that you want to have access to the full range of web directories (but not root privileges): usermod -a -G psaserv username — this just adds psacserv as a secondary group & the primary group stays psacln — so any new files created via these accounts will still fit the Plesk convention.

I set up one user for SSH & FTP with access to all website directories. If you go that one-user route rather than the Plesk-created users for each website, reset directory & file ownership to your super-web-user with: chown -R username:psacln * That chown operates recursively starting from the current directory, so run that only from within html/ and cgi-bin/ because otherwise it will try to reset ownership on your system files, log files & other non-public stuff that should probably stay assigned to root.

Similarly depending on how you upload/migrate your web files, you may need to set correct permissions on files & directories within html/:

find . -type f -exec chmod 644 {} +
find . -type d -exec chmod 755 {} +

(Execute these commands only from within the directories you want affected.)

For cgi-bin/ you’ll probably want to chmod 755 script files rather than 644, so your scripts (Perl in the example below) have world-read/execute permissions:

find . -type f -name '*.pl' -exec chmod 755 {} +

Final step is have each web property execute CGI scripts as your one user. For each domain’s Apache & nginx settings, in “Additional directives for HTTP “, add:

SuexecUserGroup "username" "psacln"

Plesk sets each FTP user’s home directory to within a web directory.

Again we use Git/BeanStalk with several repos that manage groups of similar websites, so I needed an FTP login for BeanStalk to have access to the vhosts/ directory where all the website directories are located.

THE FIX: You can change the home directory for your FTP user in bash through the normal way, & Plesk doesn’t care:

usermod -d /var/www/vhosts/ username

Plesk runs all cron jobs as root.

Any files that your cron job creates get root user permissions & are not available to the web server users. Plesk shows the cron user as root, but it’s not anything you can change. Yes, this is lame.

THE FIX: Have each cron run a shell script that uses su, sudo or runuser to switch to the web-level user first. For example, have the cron run a shell script with:

/sbin/runuser username -s /var/www/vhosts/domain.com/cgi-bin/somescript.pl

Or you could have each cron job command (each entry in Plesk) start with one of the user-switching methods. But since cron commands become the email subject for status notifications, the subject line would start with “runuser” etc all the time.

Plesk doesn’t serve web font files correctly by default.

We serve css & web fonts from a different domain than the main website, so we need to have an access control header to allow that. The standard code is:

<FilesMatch "\.(ttf|otf|eot|woff)$">
<IfModule mod_headers.c>
    Header set Access-Control-Allow-Origin "*"
</IfModule>
</FilesMatch>

This worked great on GridServer in .htdocs, but didn’t have any effect after we migrated to Plesk. As far as I can tell, mod_headers is enabled by default so that’s not the problem. Eventually I noticed the response header for the web font files was nginx & not Apache. I got it working by going into Apache & nginx Settings for the domain & disabling “Smart static files processing”. I think what’s happening is without the second box checked that defines specific extensions, nginx serves font files by default so the request never makes it to Apache.

Even if it works for you to have nginx serve your font files, I found nginx serves them as text/plain so under the MIME types section at the top of the same screen, it might help to add:

font/ttf .ttf
font/opentype .otf
application/font-woff .woff
application/vnd.ms-fontobject .eot

MediaTemple warns that you’ll lose all your (gs) IMAP email as soon as you click Point At Another Server in AccountCenter.

FIX: True, but you can still switch your site over to (dv) without losing old email. Instead of clicking Point At Another Server, go about adding/migrating your site & ignore Plesk’s DNS warning. Then when you’re ready to switch web traffic over, in AccountCenter, edit DNS & change the A records from your (gs) IP to your (dv) IP.

Make sure you have email set up in Plesk before switching A records, because although you won’t lose your old email, new email will start going to your (dv) accounts.

This way although your domain gets switched over to (dv), you won’t lose your old (gs) email because you can still access it through your gridserver domain (sXXXXXX.gridserver.com) or xxxx-xxxx.accessdomain.com. If you’re not sure what these are, in AccountCenter, click on Server Guide for your grid server & look at the Email section.

Incidentally migrating IMAP email is really easy with Thunderbird. Add your new IMAP account, select all the folders in your old account, drag over to new & you’re done. Then do the Point At Another Server thing.

Plesk doesn’t come with cpan or any Perl modules (or gcc).

I’m a dinosaur, I guess. The “yum” installer does have a bunch of Perl modules available but is missing lots of the common modules I use. Cpan works fine for me. Luckily you can use yum install install CPAN & gcc:

yum install perl-CPAN
yum install gcc

BEFORE YOU RUN CPAN: the yum-installed CPAN adds some environment variables to ~root/.bashrc which sets cpan to install Perl modules under root rather than in one of the @INC locations, so fix that by deleting the added lines in .bashrc & also delete ~root/perl5/ and ~root/.cpan/. Then run cpan setup & picking “lib::local” should put Perl modules into a web-accessible lib/ directory.

Using cpan to install GD doesn’t work.

Cpan aborts with an error message: Could not find gdlib-config in the search path. Please install libgd 2.0.28 or higher. I’m not a sysadmin & didn’t want to mess with this. Easy fix — use “yum” to install GD instead:

yum install gd

Mod_perl under CentOS7 behaves inconsistently compared to the CentOS6 Perl CGI environment.

With CentOS7 the only way I could get Perl scripts working via Apache was to use mod_perl, & with mod_perl the output/success of Perl scripts is inconsistent due to the way mod_perl compiles our Perl scripts that weren’t specifically coded for mod_perl. Generally the first request is successful while subsequent requests fail.

The big problem I ran into was when global subroutines defined in our custom modules are loaded via require("somemodule.pm"), the error log shows “undefined subroutine”. I believe this is why (in my case, it’s scenario 3).

Added bonus, under mod_perl, relative paths don’t work. I could work around that if I had to, but the custom module problems are a deal-killer.

Still troubleshooting. This sucks.

The MT sales rep set up the (dv) account with a made-up domain.

The issue here is my rep felt they needed to put down something temporary while I got started with the site migration. I don’t think the fake domain was a good idea because it caused problems. The second time I went through this DV account switch, the rep used my primary domain for setup & everything worked just fine. The fake domain isn’t just for a name in AccountCenter, which is what tech support first told me.

The fake domain gets set as Reverse DNS for your new (dv) service IP address, which can cause your IP to get blacklisted for email. Minor detail, yep.

THE FIX: As soon as you get your primary site migrated over, fix the Reverse DNS (AccoutCenter, DNS section). Then change the primary AccountCenter domain for your (dv) account to your real domain – that’s hidden in AccountCenter under Server Guide.

Replace Your Noisy Drobo5N (or 5D) Fan

PLEASE NOTE: Although I initially wrote this post about the Drobo 5N, several commenters have pointed out that the Drobo 5N & 5D use the same chassis & so this is equally helpful for fixing noisy Drobo 5D fans too.

Drobo5N fan replacementDrobo makes a nice backup system, but the cooling fans are crap. The fan in my Drobo 5N was no exception & failed after 3 years, most of which it spent on standby with the drives spun down. As far as I know, the Drobo cooling fan runs constantly even when the drives are spun down.

For the cost of a $15 fan & maybe an hour of your time, you can replace the fan in your $500 Drobo5N backup system.

You’ll need a replacement 120x25mm 12VDC 1.9W 2-wire fan, soldering iron & solder (or very small wire nuts), phillips screwdriver, 1/16″ shrink tubing (and lighter) or electrical tape, & a paperclip.

Also see the very helpful comments on these steps from Tad Harrison — the 3rd comment at the end of this post.

  1. Shut down & unplug the Drobo. Remove the hard drives & remember the drive order in the bays. It might not matter, but why tempt fate?
  2. Remove the magnetic faceplace & pull out the rubber gasket from the groove behind the faceplate.
  3. Unscrew the 4 rubber feet on the bottom of the unit. Also remove the small hatch on the bottom that covers the mSATA bay.
  4. Slide the metal case off the chassis. I don’t think it matters which end you slide it off. The case is split in half on the bottom. You’ll need to lift up one side just a bit to get the case to slide past a few items in the mSATA bay.
  5. Push in the plastic tabs to remove the fan backplate on one end & the drive bays on the other end. I think there’s 5 tabs for each. This part was easy.
  6. Unscrew 4 screws total, on the sides at the fan end: 1 upper & 1 lower screw. Leave all the other screws in place. Trust me on this.
  7. Slide the top of the chassis back & up to separate it from the bottom/sides. This can be tricky – use a flat screwdriver to pry the lower slot closest to the back (see photo) if it’s stuck. Unplug the white plastic fan & power switch connectors when you can get to them – they just pull, no clips.
  8. Drobo5N fan anchor

    Don’t pry off from the head end!

    Finally, easy access to the fan! Not so fast, Batman. The fan is held in place by 4 plastic anchors that work like drywall anchors – there’s a center pin which spreads out the tip of the anchor when it’s pushed in all the way. Best method for removal is push the center pin from the fan side with a paperclip or small nail until the anchor pops out. Don’t try prying the anchors from the cap end or you’ll likely end up breaking them off.

  9. Cut the fan wire close to the old fan so you have decently long leads on the connector plug end.
  10. Solder (or use wire nuts, or butt splice connectors) the plug onto the new fan wires. If you solder, use shrink tubing! It’s awesome. Remember to slide the tubing on, before you solder.

Now you’re ready to put everything back together. Really this is just an excuse to start the instruction numbering over at #1. Also now that you’re in this deep, let’s make putting your Drobo back together look like 4 steps:

  1. Reattach the fan to the chassis with the plastic anchors you didn’t break. Make sure the the fan is oriented correctly so it blows air out the rear vent. The side with the hub struts is the “exhaust” side, so you would want that facing the rear. Stare at the fan blade shape for a bit & you’ll figure it out. Some fans have arrows on the cowling that indicate airflow direction.
  2. Slide the chassis back together, reconnect the fan & power switch connectors, & screw the 4 screws back in. PRO TIP: make sure the fan wires aren’t in the way of the fan blades.
  3. Snap the fan backplate & the drive bays back in. It can be a little tricky to get the drive bays seated all the way. Make sure you line up the many clear plastic nubs along the bottom edge with the all holes (these are the blue lights that indicate capacity).
  4. Slide the chassis back into the case. Reinstall the mSATA hatch cover, rubber feet, rubber gasket, drives, & magnetic faceplate. Plug in & turn on.

Nice work. You saved $500 on a new Drobo.

Hope the new fan lasts longer than the old one.

Workaround For MediaTemple’s Lame Gridserver Cron Job Limitation

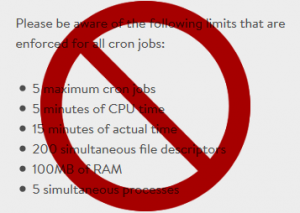
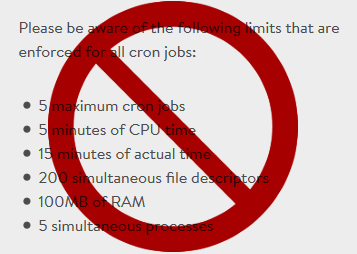
MediaTemple limits their GridServer (GS) customers to only 5 cron jobs.

Some restrictions make sense … some don’t!

This makes absolutely no sense.

MediaTemple allows cron jobs to run as often as every 5 minutes … I needed more than 5 weekly processes, which put no strain on the server compared to someone who sets up 5 jobs to repeat every 5 minutes.

Limits on cron jobs by run frequency would be far too logical.

As a workaround, combine all your weekly crons into one daily job, your daily crons into an hourly job, etc. Then create a shell script that uses date logic tests to branch out to different jobs, based on the day of the week or hour of the day.

For example, here’s a daily cron script that branches out into weekly jobs:

if [ $(date +%u) -eq 1 ]; then ./monday.pl
elif [ $(date +%u) -eq 2 ]; then ./tuesday.pl
elif [ $(date +%u) -eq 3 ]; then ./wednesday.pl
....
elif [ $(date +%u) -eq 7 ]; then ./sunday.pl
fi

If you don’t have a job for every day of the week, just leave out the logic test for that day & the cron script will exit without running anything further.

Similarly with a cron script set to run hourly, you can test the hour to run up to 24 different daily jobs (one for each hour):

if [ $(date +%k) -eq 0 ]; then ./twelve-oclock-am.pl
elif [ $(date +%k) -eq 1 ]; then ./one-oclock-am.pl
elif [ $(date +%k) -eq 2 ]; then ./two-oclock-am.pl
....
elif [ $(date +%k) -eq 23 ]; then ./eleven-oclock-pm.pl
fi

Taking this to the extreme, in theory you could use an every-5-minutes cron job to test $(date +%M) and run up to 12 different jobs per hour. And it goes without saying you can combine these day/hour/minute logic tests to create 2,016 possible combinations, or throw in some $(date +%d) day-of-the-month tests for 62,496 possible cron jobs. Take that, MediaTemple-cron-limitation-type people!

Obviously the script names in the examples above (monday.pl, twelve-oclock-am.pl, etc) can be changed to anything you want.

I’m not on MediaTemple’s GridServer platform anymore, but hope this helps someone. I switched to a their DV/VPS platform & promptly discovered they assigned a blacklisted IP to my account. So far they are refusing to fix it. Good thing MediaTemple doesn’t sell cars.

UPDATE: To their credit, MediaTemple finally saw the logic in providing new accounts with non-blacklisted IPs, so that’s good.

Fake Domain Offers from Cloe Harris

Cloe Harris fake domain offersWatch out for domain offers from Cloe Harris, like this one (see below) … it’s fake.

If you write back, chances are you’ll start receiving far more spam emails in your inbox rather than serious offers. Sadly “Cloe” only wants you for your email address.

If you do reply back about the offer — hopefully because you want to mess with the scammers — I’d go through a temporary email account service like HideMyAss.com or sign up for a (new) Gmail account.

Remember the Internet rule: if something is too good to be true, it usually is.

Here’s the fake domain offer email:

From: Cloe Harris <cloeharris04@gmail.com>

Hi,

I have taken an interest in purchasing your domain [your domain name].

Please let me know if you are interested in selling. If so, all I need is your selling price and we will make a decision.

Thank you!

Regards,
Cloe Harris

Streaming Video To iPhone/iPad App Review

I have a Drobo FS. It’s a great backup solution, but not the most media-streamable NAS out there. I needed something that could stream video, starting out in various Apple-unfriendly formats up to 1080p, from my NAS to my iPhone.

First off, I tried the MediaTomb DLNA media server which installs directly on the Drobo — no attached computer required. Paired with the AirPlayer app as the DLNA player, that system worked well enough for sub-1080p video. iPhone can't handle 1080p AirPlayer handled all the various video formats very well (including non-Apple formats like AVI & WMV), but the hardware on the iPhone simply can’t handle downconverting 1080p. Enter transcoding.

Transcoding means your media server converts the resolution/bitrate to something else before firing it out to your playback device. So although the video may start off as a 1080p super-high bitrate clip, your media server downconverts it to 720p or whatever your playback device can deal with. The encoding can change too.

Here’s the current wolfpack of transcoding media streaming iOS apps:

VLC Streamer Free VLC Streamer Free

Good news: it worked.

Bad news: videos to be transcoded have to be selected individually beforehand on the computer, & they are dumped in your Application Data folder as a million small .ts files.

So, the only way to have a transcoded video library with VLC Streamer was to duplicate my entire video library. Deal killer.

Plex Media Server (yep, PMS)Plex Media Server

Good news: The Plex interface looks really slick, both for the PMS web interface & their Plex player iPhone/iPad app ($4.99 but Plex is free otherwise). Plex does a really nice job displaying your media, pulling metadata & matching up cover art from various providers. Also Roku has a free Plex channel app, so you can stream video over WiFi to your TV. Neat!

Bad news: Plex doesn’t let you browse a nested folder structure. They used to, but not anymore. Instead they rely completely on metadata. Or you can restructure your folder structure to fit their models. Their “By Folder” view lumps everything together in one gigantifuck mess. My video library doesn’t have metadata & restructuring is not an option. ARRRHHG! So frustrating, so stupid. Pages & pages & pages & pages of Plex users agree.

Air VideoAir Video

The good news: everything. So many good things, where to begin. First off, there’s no indexing. Install the Air Video media server & app ($2.99), pick a source folder or two, & you’re done. Thumbnails & transcoding are done on the fly & with no temporary storage on the server … unless you want that (nicely done!). You can stream media within your network or outside too, with or without server password protection. You can download converted clips to your iPhone/iPad for later playback, straight from the app.

Bad news: I honestly don’t have much to say. I wish there were permission levels for shares. Nothing else. Air Video wins.

Air PlayIt / Air PlayIt HDAir PlayIt

Good news: Very similar to Air Video, & free! Has three preset permission options (admin, kids, public) that can be set on each share — this alone is brilliant. PMS/DLNA developers should take note. Why permission levels aren’t a standard feature on all streaming engines is a sad, thoughtless mystery. The wait once you click play on a video to transcode is nice & short. Air PlayIt also has the on-demand offline conversion option.

Bad news: Took forever to show the folders on the first view through the app – it waits to do indexing until the folder view is first requested, & then indexes EVERYTHING, while you wait… and wait… and … wait ….. it gets a little better on subsequent views, but all the waiting to just navigate folders is painful. I do have a lot of folders nested so maybe it’s a less common use case, but Air PlayIt server seems to be scanning the entire structure rather than just the section of the tree I’m viewing. Something’s very inefficient there.

Other than that, very good app overall, & can’t really complain that much for the price.

StreamToMeStreamToMe

At $2.99, StreamToMe is another very good option. I’m going to let TUAW.com take this one — if I wrote anything, I’d just be paraphrasing their StreamToMe versus Air Video review.

ZumoCast

ZumoCast was bought by Motorola & isn’t available for Apple devices anymore.

Any Others?

Any streaming apps I missed? Let me know in the comments.

HP Pavillion Laptop Fan Cycles On & Off & On & Off & On…

HP Pavillion dv6t fan cycles on & off endlessly

How I fixed my HP Pavillion dv6t CPU fan

I recently bought a HP Pavillion dv6t laptop, only to return it after a few days — I’d press the power button to turn it on & it would cycle off & on 10-15 times before eventually deciding to stay on for good. HP tech support took 6 solid hours on the phone to cheerfully wade through their pre-exchange process in a futile attempt to fix an obvious hardware power problem (doing things like a full-system virus scan) … but they finally accepted it back.

After another few weeks, I received my shiny new HP Pavillion dv6t, take two! I happily turned it on (and it stayed on), & almost immediately I noticed the cooling fan cycling:

Whiirrrrrrrr…. silence. Whirrrrrrrr…. silence. Whirrr….. silence.

The cooling fan would cycle on & off every ~30 seconds. It would turn on with a loud whir, then slowly decrease speed down to near-silent, then shut off for 10 seconds, & start the whole thing over. Pretty freaking annoying. Granted it was marginally better than the power cycling issue with my first Pavillion dv6t, but this was the CPU fan equivalent of Chinese water torture.

I checked the System Resource monitor, no CPU or disk usage spikes. Tried rebooting, no difference. Tried it plugged in & on battery … Changed power settings around … Cursed HP & threatened to exchange it yet again. Nothing. The only improvement was when the processor was under load — the fan stayed on a little longer between its spastic cycling.

I found a “Fan Always On” setting enabled in the BIOS (which clearly wasn’t working) & tried switching it to “Disabled”. It made the pause between the fan cycling only slightly longer. Someone at HP has an evil sense of humor.

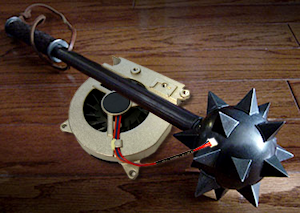
At this point I got my CPU fan mace off the shelf & started practicing. As a last resort, I tried a BIOS update, although HP’s BIOS update changelog didn’t mention any cooling management improvements. But, it COMPLETELY FIXED the fan cycling problem.

Unfortunately I didn’t write down what BIOS version with apparently defective fan management I started out with, but regardless, the most recent BIOS update from the HP website fixed the issue.

Hope this helps someone else out there. I still have nightmares. Whirr… silence. Whirrr…

UPDATE: I’m sorry to report that the BIOS update only partially fixed the fan problem. It’s not occurring as frequently now as before the BIOS update, but still pretty annoying. Now the fan cycling happens occasionally for 5-10 minutes whenever I use the laptop on battery power. It’s not because the fan vent is blocked — I have the 9-cell battery that creates about an inch of space under the back edge.

Apache httpd.conf changes ignored in Windows 7

VirtualStore in Windows 7 causes problems

Feature? Hack? Or hugely misguided mistake?

Imagine this: You are a web developer. You buy a brand new computer running Windows 7. You install Apache using all the default installation options. You fire up your browser to see Apache’s “It works!” test page …so it does, Apache. Awesome.

You edit httpd.conf to point to your latest web project, restart Apache, refresh the browser. Which still shows It works! … not your project. Hmm. No startup errors in the Apache error.log …. you close & reopen httpd.conf & your changes still look good. Apache still shows It works! In a mad rage you delete all settings in httpd.conf & bang out some undocumented 4-letter profanity settings guaranteed to throw Apache startup errors. Restart Apache. It works! No, Apache, it doesn’t!! What the fuck.

WTF is happening is a little-known feature, hack, & extremely bad idea from Microsoft in Windows 7 (and some other versions) called VirtualStore. VirtualStore should have been called VirtualStoreYourFilesElsewhereAndNotTellYou, because that’s what is occurring.

When you saved your edited httpd.conf file, Windows 7 secretly saved it in (deep breath) …

/Users/[Your User Name]/AppData/Local/VirtualStore/Program Files/Apache Software Foundation/Apache2.2/conf/httpd.conf

… and a hidden link gets created within your Program Files folders to the VirtualStore copy. Normally this works okay with legacy Windows programs, but apparently with Apache running as a service, it doesn’t pick up the VirtualStore link.

The upshot is while you continue madly editing your VirtualStore’d httpd.conf, Apache continues reading the original, which you are secretly being prevented from editing. How are you supposed to know what’s going on? Take a look …

Awful VirtualStore Warning

Microsoft's alert that VirtualStore files exist

Yea. One little icon in the action bar. Not at all noticeable.

(Microsoft should consider using my patented red oval).

No indication of which files are “Compatibility Files”.

And apparently, the linked file system doesn’t work consistently. What a stupid feature. It’s a hack, really, trying to blindly protect an operating system infamous for core-level security flaws.

How about a simple warning that the VirtualStore hack was occurring? Or ditch VirtualStore & display a UAC-style dialog, “Program X wants to write to Program Files, cancel or allow?” Even cancel or allow would be an improvement.

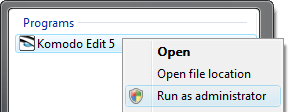
run as Administrator

Don't forget this minor detail.

What triggered VirtualStore in the first place? Way back when you fired up your text editor, you needed to run it in Administrator mode. Only then does it have the ability to save files directly under the protected Program Files folder structure without VirtualStore links.

How to fix the VirtualStore mess — First, move your Apache config file(s) out of the VirtualStore folder structure. Then delete the Virtualstore/Apache Software Foundation/ folder. That removes the “Compatibility Files” links from the real directory. Then you can run your text editor in Administrator mode & redo your Apache config edits.

Or even better: right-click on the folder that contains the files you want to edit, click Properties, Security tab & give Full Access privileges to your Windows user.

Notepad (& possibly Wordpad) won’t trigger VirtualStore — instead they’ll simply throw a “permission denied” error until you switch to Administrator mode. Most third-party editors like Komodo Edit will silently generate the VirtualStore’d copies until you run them in Administrator mode.

You can see which of your applications are being VirtualStore’d by opening Task manager, Processes tab, View menu, “Select Columns…”, check Virtualization. Back at the task list, any process with “Enabled” in the column means you’re in for some VirtualStore fuckedupedness.

Best part: VirtualStore isn’t just for files — any program attempting to write to the registry under the HKEY_LOCAL_MACHINE\Software branch will be VirtualStore-slapped over to HKEY_CURRENT_USER\Software\Classes\VirtualStore\MACHINE\Software

Hope this helps someone! As someone commented on another blog, “I really hate how Microsoft surprises you with their new retarded ways of keeping us safe from ourselves.” Amen to that.

If you have Windows 7 Professional, Ultimate, or Enterprise editions, you can disable VirtualStore completely through the Local Policy Editor. This may prevent some legacy programs from running, however.

For more, see VirtualStore is horrible. How do you disable it in Windows 7.

Scanning legal-size documents with the Canon MX860 ADF is needlessly complicated

Canon MX860: how to scan legal-size documents

Pound the Canon MX860 repeatedly with a gavel.

You’d think in this day & age of all-in-one printers, you could put a legal-size document in the document feeder (ADF) & scan away. Not so with the Canon MX860.

Out of the box, the MX860’s ADF will scan legal-size documents as a letter-size PDF with the bottom 3 inches cut off. Document length auto-detection with the ADF was apparently too complex for Canon engineers (?!)

Technically the MX860 can scan legal-size paper, but it’s a trick (“trick” meaning pain in the ass) if you typically use the handy buttons on the scanner for everything. Here’s how:

Load up the MX860’s desktop scanning software, which Canon cryptically called “MP Navigator EX” — mine opens up to a wizard-style screen. Select “Stack Of Documents (ADF)”, the click the “Specify…” button on the left-hand side & there you can temporarily change the PDF document size for the next ADF scan.

If you scan legal documents all the time & want to change the settings permanently: Click the “Preferences” button (top/right corner) & switch to the “Scanner Button Settings” tab. Then you can change the document settings for each one-click action. So for instance you could set the “Save to PC” action to scan a legal-size PDF & “Save to PDF” to scan in letter size.

Sounds needlessly complicated? It is, absolutely. Hopefully Canon will add automatic document length detection for the ADF in a future firmware/software update, but I wouldn’t count on it.

(Anyone know if this is fixed with the Canon MX870?)

Page 1 of 2

Powered by WordPress & Theme by Anders Norén