 I recently moved lots of websites off MediaTemple’s GridServer (gs) platform to their Dedicated Virtual (dv) platform. I’ve kind of abused Grid Server for the past 12 years, but finally the overage fees caught up.
I went with the Plesk 12.5/CentOS6 hosting option one year later, I upgraded DV accounts & did this all over again for Plesk Onyx 17/CentOS7. The standalone DV server was tempting but I don’t quite know enough about Linux admin to go that route.
Here were some of the bigger migration issues going from MediaTemple’s GridServer (gs) to Dedicated Virtual/VPS (dv) service.
Plesk doesn’t come with root enabled.
Chances are you’ll need to enable root, which is done through AccountCenter. At first I tried not to enable root but there’s just too many fixes/workarounds that you can’t do without root access.
Plesk creates websites with the web directory set to httpdocs/
…Whereas GridServer uses html/ for the top-level web directory. I prefer the shorter “html”, & I really don’t like changing things like this in Git which we use for development. Luckily it’s easy to change how Plesk works here.
THE FIX: In Plesk, click on your domain & click Hosting Settings. Change Document Root to html/. Plesk will create html/ but leaves httpdocs/ so you’ll have to delete httpdocs/ manually.
Note: for the rest of this post I’ll continue to reference “httpdocs/” for consistency.
Plesk puts cgi-bin/ as a subdirectory of httpdocs/
In other words, Plesk uses httpdocs/cgi-bin/. GridServer had cgi-bin/ at the same level as html/. So basically if you’ve used Git for years like we have, you can either move the folder in Git & hope the history stays or change how Plesk works. Moving the folder & keeping the Git history is possible, but messing with Git gives me the creeps.
THE FIX: Create cgi-bin/ where you want it & set permissions using chmod 755 cgi-bin/. It’s probably good to follow Plesk convention where top-level web directories are assigned to the psacserv group so chgrp psaserv cgi-bin/ too. This worked with Plesk 12 under CentOS6, but Plesk Onyx under CentOS7 requires cgi-bin/ to stay assigned to the psacln group or else Perl scripts running under Apache mod_cgi will return the 500 error “End of script output before headers” (thank you MediaTemple CloudTech Supervisor Gary R for figuring that out).
Then in Plesk under the domain, click Apache & nginx Settings. Scroll to the “Additional Apache Directives” section and add:
ScriptAlias "/cgi-bin/" "/var/www/vhosts/domain.com/cgi-bin/"
I found out Plesk directly supports moving cgi-bin to the www-root level & doesn’t need a ScriptAlias added manually. Run these commands:
/usr/local/psa/bin/domain -u domain.com -cgi-mode www-root
/usr/local/psa/admin/bin/httpdmng --reconfigure-domain domain.com
In Plesk under Hosting Settings, now you’ll see a select box:

Finally click Hosting Settings & disable “Perl”. It’s not what you think. This Plesk option actually disables mod_perl, & does not disable “regular” mod_cgi Perl.
Mod_perl is very efficient but typically requires porting over your Perl scripts, or else it can wreak havoc, as described in pretty much the entire porting guide.
Fun fact: The Plesk “Perl” option isn’t tied to the cgi-bin/ location. It only updates <Directory> options for the httpdocs/ folder — you can watch Plesk change the setting in vhosts/system/domain.com/conf/httpd_ip_default.conf — so if you’ve moved cgi-bin/ out of httpdocs/ to the www-root level, it won’t actually matter whether or not you disable the “Perl” option in Plesk.
Last step is to delete the now-defunct httpdocs/cgi-bin/ directory.
Plesk creates websites directories with a bunch of default & testing files.
THE FIX: SSH to your account, change to the website directory & rm -rf html/*. I’m assuming you know enough about Linux to realize this deletes everything in html/ so make sure you haven’t uploaded the website files you want to keep, yet.
Plesk sets up subdomains as subdirectories of the parent website.
In other words, Plesk creates domain.com/httpdocs/subdomain.com/. This sucks. Luckily, easy fix. When adding the subdomain site in Plesk, pick the primary domain option rather than the subdomain option. Ignore the “www” prefix. The subdomain site will work fine & you’ll just have an extra domain alias for www.subdomain.domain.com in nginx & Apache that won’t be used.
Plesk forces you to create a different user for each web site.
The files all get assigned to that user, & group psacln. The httpdocs/ directory is also assigned to the same user, & group psaserv. So, users can’t browse each others’ web folders. By default, with Plesk you can’t have an FTP account that has access to multiple web sites, which is what I needed since we use one Git repository deployed via BeanStalk to manage ~30 very similar websites with shared resources.
THE FIX: First su root & grant the psacserv group to ssh/ftp users that you want to have access to the full range of web directories (but not root privileges): usermod -a -G psaserv username — this just adds psacserv as a secondary group & the primary group stays psacln — so any new files created via these accounts will still fit the Plesk convention.
I set up one user for SSH & FTP with access to all website directories. If you go that one-user route rather than the Plesk-created users for each website, reset directory & file ownership to your super-web-user with: chown -R username:psacln * That chown operates recursively starting from the current directory, so run that only from within html/ and cgi-bin/ because otherwise it will try to reset ownership on your system files, log files & other non-public stuff that should probably stay assigned to root.
Similarly depending on how you upload/migrate your web files, you may need to set correct permissions on files & directories within html/:
find . -type f -exec chmod 644 {} +
find . -type d -exec chmod 755 {} +
(Execute these commands only from within the directories you want affected.)
For cgi-bin/ you’ll probably want to chmod 755 script files rather than 644, so your scripts (Perl in the example below) have world-read/execute permissions:
find . -type f -name '*.pl' -exec chmod 755 {} +
Final step is have each web property execute CGI scripts as your one user. For each domain’s Apache & nginx settings, in “Additional directives for HTTP “, add:
SuexecUserGroup "username" "psacln"
Plesk sets each FTP user’s home directory to within a web directory.
Again we use Git/BeanStalk with several repos that manage groups of similar websites, so I needed an FTP login for BeanStalk to have access to the vhosts/ directory where all the website directories are located.
THE FIX: You can change the home directory for your FTP user in bash through the normal way, & Plesk doesn’t care:
usermod -d /var/www/vhosts/ username
Plesk runs all cron jobs as root.
Any files that your cron job creates get root user permissions & are not available to the web server users. Plesk shows the cron user as root, but it’s not anything you can change. Yes, this is lame.
THE FIX: Have each cron run a shell script that uses su, sudo or runuser to switch to the web-level user first. For example, have the cron run a shell script with:
/sbin/runuser username -s /var/www/vhosts/domain.com/cgi-bin/somescript.pl
Or you could have each cron job command (each entry in Plesk) start with one of the user-switching methods. But since cron commands become the email subject for status notifications, the subject line would start with “runuser” etc all the time.
Plesk doesn’t serve web font files correctly by default.
We serve css & web fonts from a different domain than the main website, so we need to have an access control header to allow that. The standard code is:
<FilesMatch "\.(ttf|otf|eot|woff)$">
<IfModule mod_headers.c>
    Header set Access-Control-Allow-Origin "*"
</IfModule>
</FilesMatch>
This worked great on GridServer in .htdocs, but didn’t have any effect after we migrated to Plesk. As far as I can tell, mod_headers is enabled by default so that’s not the problem. Eventually I noticed the response header for the web font files was nginx & not Apache. I got it working by going into Apache & nginx Settings for the domain & disabling “Smart static files processing”. I think what’s happening is without the second box checked that defines specific extensions, nginx serves font files by default so the request never makes it to Apache.
Even if it works for you to have nginx serve your font files, I found nginx serves them as text/plain so under the MIME types section at the top of the same screen, it might help to add:
font/ttf .ttf
font/opentype .otf
application/font-woff .woff
application/vnd.ms-fontobject .eot
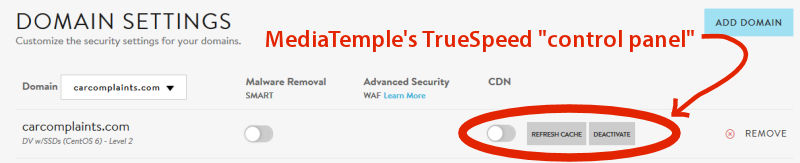
MediaTemple warns that you’ll lose all your (gs) IMAP email as soon as you click Point At Another Server in AccountCenter.
FIX: True, but you can still switch your site over to (dv) without losing old email. Instead of clicking Point At Another Server, go about adding/migrating your site & ignore Plesk’s DNS warning. Then when you’re ready to switch web traffic over, in AccountCenter, edit DNS & change the A records from your (gs) IP to your (dv) IP.
Make sure you have email set up in Plesk before switching A records, because although you won’t lose your old email, new email will start going to your (dv) accounts.
This way although your domain gets switched over to (dv), you won’t lose your old (gs) email because you can still access it through your gridserver domain (sXXXXXX.gridserver.com) or xxxx-xxxx.accessdomain.com. If you’re not sure what these are, in AccountCenter, click on Server Guide for your grid server & look at the Email section.
Incidentally migrating IMAP email is really easy with Thunderbird. Add your new IMAP account, select all the folders in your old account, drag over to new & you’re done. Then do the Point At Another Server thing.
Plesk doesn’t come with cpan or any Perl modules (or gcc).
I’m a dinosaur, I guess. The “yum” installer does have a bunch of Perl modules available but is missing lots of the common modules I use. Cpan works fine for me. Luckily you can use yum install install CPAN & gcc:
yum install perl-CPAN
yum install gcc
BEFORE YOU RUN CPAN: the yum-installed CPAN adds some environment variables to ~root/.bashrc which sets cpan to install Perl modules under root rather than in one of the @INC locations, so fix that by deleting the added lines in .bashrc & also delete ~root/perl5/ and ~root/.cpan/. Then run cpan setup & picking “lib::local” should put Perl modules into a web-accessible lib/ directory.
Using cpan to install GD doesn’t work.
Cpan aborts with an error message: Could not find gdlib-config in the search path. Please install libgd 2.0.28 or higher. I’m not a sysadmin & didn’t want to mess with this. Easy fix — use “yum” to install GD instead:
yum install gd
Mod_perl under CentOS7 behaves inconsistently compared to the CentOS6 Perl CGI environment.
With CentOS7 the only way I could get Perl scripts working via Apache was to use mod_perl, & with mod_perl the output/success of Perl scripts is inconsistent due to the way mod_perl compiles our Perl scripts that weren’t specifically coded for mod_perl. Generally the first request is successful while subsequent requests fail.
The big problem I ran into was when global subroutines defined in our custom modules are loaded via require("somemodule.pm"), the error log shows “undefined subroutine”. I believe this is why (in my case, it’s scenario 3).
Added bonus, under mod_perl, relative paths don’t work. I could work around that if I had to, but the custom module problems are a deal-killer.
Still troubleshooting. This sucks.
The MT sales rep set up the (dv) account with a made-up domain.
The issue here is my rep felt they needed to put down something temporary while I got started with the site migration. I don’t think the fake domain was a good idea because it caused problems. The second time I went through this DV account switch, the rep used my primary domain for setup & everything worked just fine. The fake domain isn’t just for a name in AccountCenter, which is what tech support first told me.
The fake domain gets set as Reverse DNS for your new (dv) service IP address, which can cause your IP to get blacklisted for email. Minor detail, yep.
THE FIX: As soon as you get your primary site migrated over, fix the Reverse DNS (AccoutCenter, DNS section). Then change the primary AccountCenter domain for your (dv) account to your real domain – that’s hidden in AccountCenter under Server Guide.


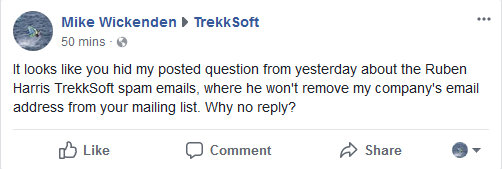
 Back in September 2017, an email address at my small scuba diving company Hero Divers began receiving unsolicited marketing emails from Ruben Harris, ruben.h@trekksoft.io, Product Marketing Manager at TrekkSoft AG.
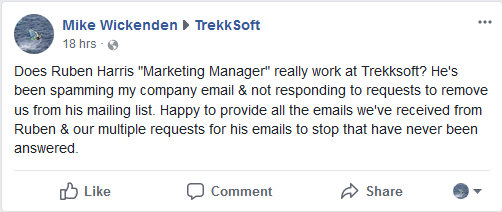

 I discovered several illicit websites have been scraping, reprocessing & re-serving copyright web content from CarComplaints.com in real-time.
 Solar panel: You can use a very low-watt solar panel connected directly to the battery with a fuse, so that the solar panel acts as a trickle-charger. The problem is the solar panel also slowly discharges the battery at night
 Solar panel w/ controller: This uses a solar charge controller which regulates power to the battery & automatically disconnects the solar panel at night. You can use any size solar panel, although panels over 20W are probably not necessary unless you are using a different system with a higher constant power draw (like a photocell) rather than the two timers.
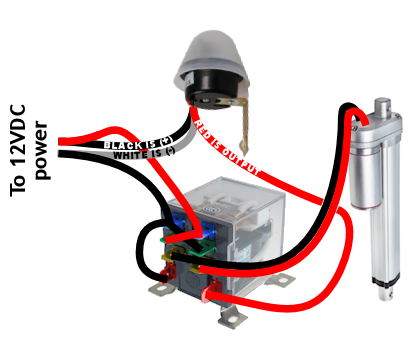
 Dedicated power: If you have A/C power to your coop, you can use a 12V power adapter with an amp rating higher than the power draw of the linear actuator. This method is by far the least expensive, but if the power goes out, your chicken coop door won’t open/close.
 Dedicated power with battery backup: Nice method that handles power outages. With this system you need a trickle charger (“battery maintainer”), and a 12V battery with an amp rating higher than the power draw of the linear actuator. As with any battery, put a fuse on the positive lead coming off the battery.
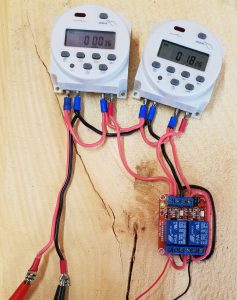

 Found this bot accessing the site via lots of different 202.46.* IPs. Reverse DNS points to ptr.cnsat.com.cn.
 You’ve no doubt discovered massive amounts of 404 errors in your main Apache error log that go something like: